How to use Server Pay
Server Pay allows you to keep track of payments owed to employee servers and contractors for completed/attempted work.
First, we must ensure that Server Pay is turned on. Go to your account settings and enable Server Pay and press SAVE.
You have the ability to set a default rate for new jobs as well as a default rate for certain employees and contractors (these rates can be set by editing the employee and/or contractor company).
When creating a new job, you can set the rate for how much you are paying the server (setting a default rate will autofill this field).
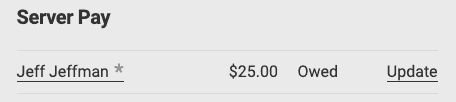
After a job is saved, the server payable will be listed on the right-hand side of the screen underneath the invoice section.
When re-assigning a job to a new server, you have the option to keep or delete the payable for the last listed server (ideal for if you pay your server per attempt and not based on success).
When updating the server payable, you can:
- Modify the amount owed
- Delete the payable
- Mark as paid
The Server Pay tab allows you to view all payments across the entire system. Filters allow you to view payables still owed, payables paid in full, and all payables.
Companies listed as a contractor will have a server pay tab within their profile entry, as do employees. Multiple jobs can be paid simultaneously from these sections by selecting the necessary jobs, pressing the Options dropdown menu, and selecting Apply Payment.
If you turn off the Server Pay option in your settings, the server pay tab will be removed from the left-hand side of the screen.
Turning off Server Pay will not delete past payables, but will simply remove them from view within ServeManager.